Wednesday 27 May 2009

Big post, perhaps

OK, Went to Car Builder Solutions on Saturday and got their usual helpful service (yep, I'd recommend them to anyone), and got my nice new petrol cap, hose and tank connector/adaptor thingy.
The tank adaptor is a flat piece of ally with a hole in it with an ally tube welded on. The idea is to use existing cap (which in my case was bolted directly to tank) to mark holes on adaptor, and use existing tank holes to attach it with.


My only criticism of the adaptor is the thickness of the plate part, which while fine for strength but didn't allow me to countersink the setscrews into it.

Simpe answer there was to cut the neck off old cap, and turn it into a big washer with countersunk holes already in.

As I was using setscrews, I had to have nylocs on the inside of tank, and the "tool" resting over the tank strap is my Heath Robinson affair, consisting of a socket the right size and a length of flattened tube welded to it, and bent so that it fits through filler tube without dropping nyloc. Worked a treat.
The next pic is of the new ally back panel, already cut approximately to shape, with the lower edge bent ready to rivet to rear lower tube and with filler hole roughly cut.

The next job was rivetting panel on the bottom chassis tube then starting the tiresome job of folding the top over chassis tube, then bending panel around the corner. This was quite difficult as I wanted to retain the shape I had made on the fibreglass panel, being a square corner at the bottom and a radiused on at the top.

Which eventually ended up like like

Yes, they are dents in the ally at the top. It's what happens when the G clamp slips.

On a slightly lighter note; whe I was at CBS, I was perusing their display boards and spotted a "Start" button. So a bit of gratuitous spending was called for. It's also served the purpose of filling a hole left by the fan override switch I'd left in the dash! Two gauge sized holes to fill yet!

It's not wired in, but the "loom" is made and just needs plugging in.

Next pic is of one of the rear arches which are going to be reprayed by a friend (Phil at HRC) who does it for a living. I'm just doing the preparation work to try and keep costs down. Yes, that's filler in all the stonechips! Both rear arches are the same.


Next job I had to do was get the roll bar brackets welded into place, so I removed all the bits I'd installed and had to weld some spacer pieces to roll bar tubes that went into chassis. For a brief moment I didn't think it was going to go back in as I took a guess on how much to widen by. Fortunately, it's a nice snug fit.

Once they were welded in, it was a case of welding top tubes into place. Unfortunately my mig skill leave a little to be desired on the neatness front, so a soon as car is on the road, I'll take it to work and go over the welds with the tig - which will be neat!
Other things I've started doing are the new ally side panels. I'd hammered the top over on a couple of the sides - which took about 1.5 hrs, with box section clamped over, but it looked rubbish. The I remembered Phil has a sheet folder so paid him a visit...

so, I'm going to redo the ones I already half made. I'm also going to lose the wood/vinyl interior and do that in ally too!

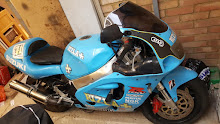
Anyway, progress is being made, so till next update, here's a gratuitous pic of a 3.9 Rover V8 with my modified exhausts:D

Till then

Simon


Thursday 21 May 2009

Now it's getting ridiculous!

Having made a decision over the last few weeks that I would be replacing the side panels with new ally, and that the back boot panel might as well be in ally too (rather than fibreglass), I ordered three sheets of 2.5m x 1.25m x 1.5mm ally yesterday.

That meant that I had to get organised in the order that work was to happen - like a list of jobs, and when they needed to be done.

Tonight that list included removing tail lights, rear arches and the boot panel. And I succeeded, and I made a template of the panel ready to transfer to the ally. So far so good, ahead of schedule.

I've spoken to a friend who's going to do the painting, just to find out what I need to do finish wise, in preparation so just need to get those bits of plastic that I can give him (off the car) filled, sanded and primed.

If I can stick to my schedule, I'm hoping to have the rear panel and both replacement side panels in place, all plastic panels ready for topcoat and the roll bar all welded, painted and fitted, the exhausts back on and plastic panels to Phil for painting by Monday pm.

Hopefully he'll be able to do them next week, so I'll have them back on the car by weekend of 30/5 and I'll just need to get the bonnet - yes, I'm going to make that from ally too - fitted!!!

Other changes I'm hoping to make include moving the fuel cap to the new ally back panel as it was a major inconvenience trying to get the fuel filler into the boot without chucking petrol everywhere and I want some new rear light assemblies to replace the budget "trailer" lights I had.

A couple more minor jobs like fi the horn, then off for ticket and tax:D

More on Monday with pics (yeah really!).

Till then

Simon

Monday 18 May 2009

Tidying up...

...from where I left off last week is what I've been up to.

As I said, the top radiator hose needed fitting and a couple of minor hoses (eg the plenum heater hoses) needed "t-ing" into what was to become the top hose.

The slight headache came when I was looking at the (original) heater hoses. On the SD1 engine, these run under the inlet manifold to the rear of engine, so I connected one straight to the header tank and the other was blanked off. On the Range Rover engine, they are both at the front of the engine, and would need blocking, but that would have created air locks (as they are both vertical).

In a moment of pure genius, I had the bright idea of getting a piece of steel tube, and welding two "t's" to go into the tops of hoses, then running that along the engine, by the injectors, to the rear of the engine, then (with a reducer) to a flexi rubber pipe to header tank. Simple!!! So I filled the system with water/antifreeze and ran the engine for about 10 minutes on Sunday.

That went well in as much as I didn't have any leaks, but it did remind me to do two things. The first was to check for oil pressure (which I have) and that I need to get the fan wired up.

Well, it's Monday as I write this and the fan was wired up earlier this evening and now works fine.

The ecu is now in residence so to speak, but I think I'll be putting a cover of sorts over that for security.

I can't remember if I mentioned that the engine wouldn't turn over on the key, but only with me shorting the starter motor terminals with a screwdriver. Well, that turned out to be a wire in the wrong place! Easy but time consuming fix, and engine now starts on the key.

There are a couple of little jobs that I need to do like wire in the tacho, but they aren't required for the MOT, so they may have to wait, as I'm quite keen on getting the bonnet done. Once that's done, I'll be ordering some more ally sheet to redo side panels and the boot (which is fibreglass at the mo). Had a chat with a friend this eveing who paints for a living and I may have him paint the car. Need to find out what sort of finish I need to get to first. Even wife was keen on it being pro painted when I mentioned it:D

Anyway, I doubt I'll do much on the car toomorrow (Tuesday) as I'll be swimming in the evening, but hopefully by the end of this (bank holiday) weekend I'll have the bonnet done and have some pics for you:D

Till Monday then...

Simon

Sunday 10 May 2009

Hurrah!

Ok, so it's not going to be a very long post, as I only did a little bit on the car today, but what a bit!

Started off this morning looking at the wiring - yeah, in complete contrast to where the wiring was in the list of jobs to do.

Anyway, firstly looked at the wires around the coil and sorted those out, then figured I needed a 6.8k Ohm resistor in the wire between a/f meter and coil, but didn't have one - except the one that goes to the speed signal thingy, which a) is supposed to limit the speed in the Range Rover and b) wasn't being used because of a)!

Anyway, sorted those out, then looked at the wires for the ecu, and if you look in all the blurb on the net it says the ecu has a brown wire for permanent live feed, also found it may be brown/orange - could I find them?! Well, no not as a direct connection!

Anyway, had a look through the bundle of wires and figured that it was another orange/? wire (yeah forgot for the mo!) and there is a white wire from coil that's needs connecting to a switched white wire from ecu.

So, connected that lot up, carefully, and thought I'd turn it on and see what happens.

Bloody hell, it started, but ran really rough, very little throttle control, high tickover (about 2500 rpm), couldn't close throttle any further etc.

Started thinking; oh dear.

Then, when I looked at the airflow meter, the bulb went of. I thought that I'd left an old rag in the plenum inlet to prevent ingress of dirt, dust, spanners, nuts and bolts etc.

Quickly removed hose, removed rag, reconnected hos and tried again.

Wow. Started instantly, ran with a slightly lumpy tickover, but instant throttle response. It occurred to me later while looking for my allen keys, that lumpy tickover is due to a couple of airleaks which I knew of, but forgot to do anything about.

Next job I started today was getting the rad back in, which involved hacking the bottom hose around a bit, but that's now back on, just the top hose to do, which I'll do over a few evenings.

And I started tidying the wiring, ready for a permanent fix.

All in all, I'd say I'm very pleased on the day's progress.

More next weekend hopefully

Till then

Simon

Monday 4 May 2009

Getting there!!

Another quickish update I'm afraid.

Didn't quite get the whole (long) weekend on the car, but I've had a good few hours today and a little time yesterday!

You'll recall the list that needed doing went something like this:

Need to make a bracket for the air flow meter
Modify exhausts as no turbo's to connect pipes anymore
Wiring will need sorting
Sort the bonnet out
Fit the radiator and plumb in
Paint the rest of the bodywork
Modify the alternator bracket
Get roll bar sorted!
Throttle linkage (which I'd forgotten)

Well the exhausts are all connected from manifold to tail pipe on both sides, so that's one of the bigger jobs done. I've also made the mounting bracket for the airflow meter - not a pretty site, but hey, just won't open the bonnet! The other successes for the day were getting throttle linkage connected up and modifying the alternator brackets. So now throttle works and alternator is back in place.

List now looks like (in order I'll do them, I think):

Fit the radiator and plumb in
Sort the bonnet out
Get roll bar sorted
Wiring
Paint the rest of the bodywork

Let's face it, fitting the radiator isn't going to take too long, possible an hour or two depending on pipework route, and how it all fits under the bonnet - it'll be slightly different than turbo route as I had the coil packs and didn't need to go over dizzy, which I now do.

The bonnet I should be able to do in a day - a fairly intensive day, and likewise sorting the rest of bodywork a similar time. The rollbar should take about four or five hours.

Still to sort the wiring, which I keep looking at and getting nowhere. It's a bit irritating really as whereever you look on the web it only needs about three wires. Can I find the elusive three?

Anyway, going for a nice cup of tea now, and will have a little more time on car tonight and tomorrow evenings, then next weekend hopefully.

Maybe more pics midweek.

Till then

Simon